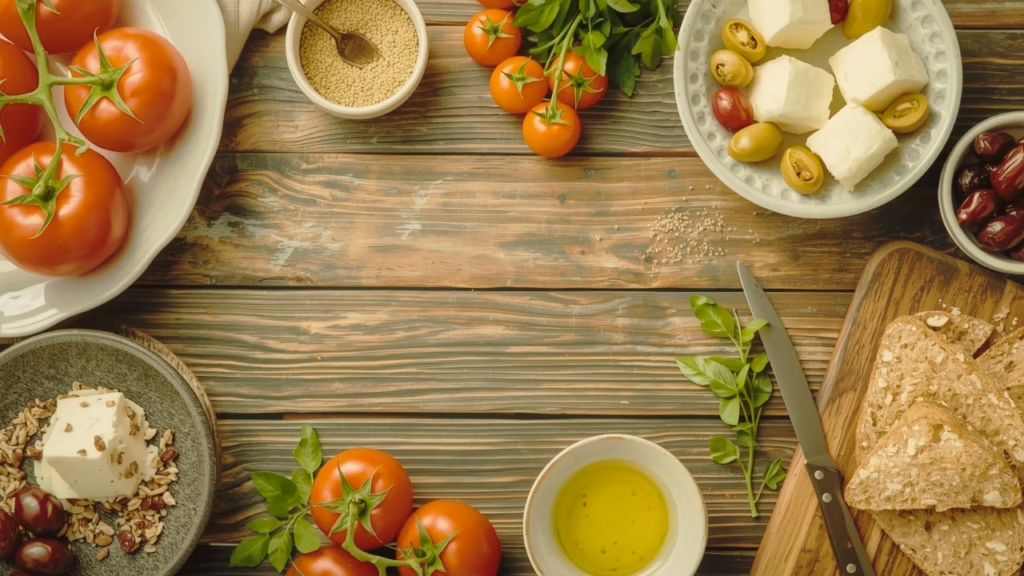
Pita Bread Making
Pita bread represents one of the oldest forms of bread still commonly consumed today, with origins tracing back thousands of years to the Middle East. This flatbread is characterized by its unique pocket structure, which forms during the baking process when steam creates a separation between the top and bottom layers of dough.
Making pita bread at home is more accessible than many people realize. The process requires only basic ingredients that most kitchens already have, and the technique, while requiring attention to detail, does not demand professional baking experience. Understanding the science behind pita bread helps ensure consistent success.
This comprehensive guide will walk you through everything you need to know about making authentic pita bread in your own kitchen, from selecting ingredients to troubleshooting common issues.

Understanding What Makes Pita Bread Unique
The Pocket Formation Process
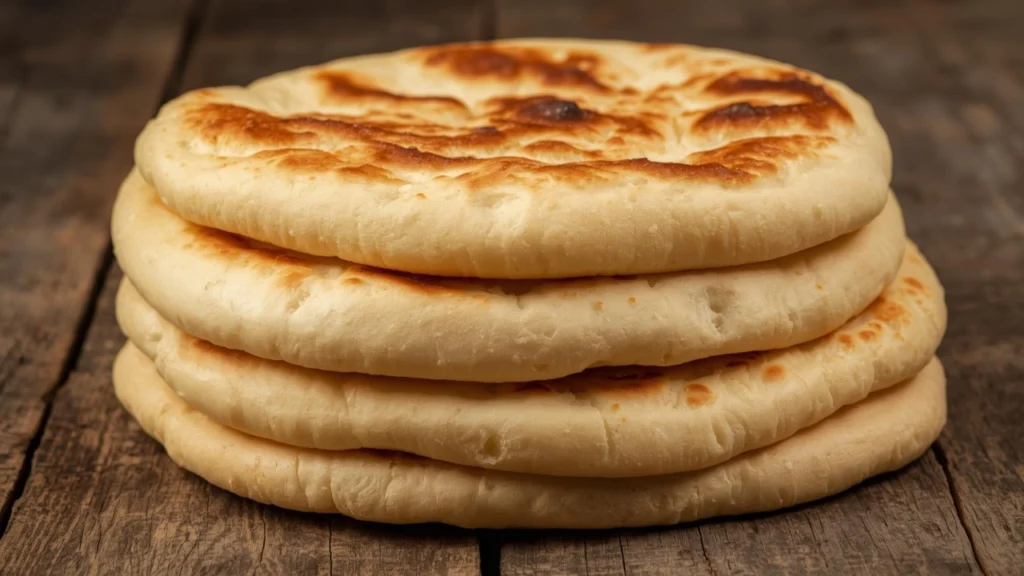
The defining characteristic of pita bread is its pocket, which forms through a fascinating interaction of heat, steam, and gluten structure. When properly prepared pita dough enters a very hot oven, the moisture within the dough rapidly converts to steam. This steam pushes the top and bottom layers apart, creating the hollow interior we associate with pita bread.
Several factors must align for successful pocket formation. The oven must be sufficiently hot, typically around 475 to 500 degrees Fahrenheit. The dough needs proper gluten development to contain the expanding steam. The thickness must be consistent, usually about one quarter inch throughout. Any weak spots or uneven rolling can prevent the pocket from forming properly.
Nutritional Profile and Ingredients
Traditional pita bread contains six basic ingredients. Flour provides the structure through gluten formation. Yeast acts as the leavening agent, creating the air pockets that make the bread light. Water hydrates the flour and activates the yeast. Salt enhances flavor and strengthens gluten bonds. Sugar feeds the yeast and promotes browning. Oil keeps the bread tender and extends shelf life.
Compared to many commercial breads, homemade pita contains no preservatives, conditioners, or additives. A single pita provides complex carbohydrates for energy, some protein from the wheat flour, and small amounts of B vitamins and iron. When made with whole wheat flour, the fiber content increases significantly.
Essential Ingredients and Their Roles
Flour Selection and Properties
All purpose flour works excellently for pita bread, providing enough protein (typically 10 to 12 percent) to develop adequate gluten structure without becoming overly tough. Bread flour, with its higher protein content, creates chewier pita with stronger pockets. Whole wheat flour produces denser, more nutritious pita a staple among Mediterranean whole grains that support heart health and longevity.
The protein in flour forms gluten when mixed with water and kneaded. This gluten network traps the gases produced by yeast and the steam generated during baking, allowing the dough to expand rather than collapse. Understanding this relationship helps you judge when dough has been kneaded sufficiently.
Yeast Types and Activation
Active dry yeast and instant yeast both work well for pita bread, though they require slightly different handling. Active dry yeast benefits from proofing, which means dissolving it in warm water with a small amount of sugar before adding other ingredients. This step confirms the yeast is alive and activates it for faster rising.
Instant yeast can be mixed directly with flour without prior activation, making it slightly more convenient. Both types produce identical results in the finished bread. The yeast ferments sugars in the dough, producing carbon dioxide gas that causes the dough to rise and creating the subtle tangy flavor we associate with yeast breads.
Temperature matters significantly when working with yeast. Water between 105 and 115 degrees Fahrenheit activates yeast optimally. Water above 120 degrees begins killing yeast cells. Water below 95 degrees slows fermentation dramatically. If you lack a thermometer, aim for water that feels comfortably warm on your wrist, similar to baby bottle temperature.
The Role of Fat and Salt
Olive oil is traditional in Middle Eastern pita bread, contributing subtle flavor and keeping the bread soft and pliable. The fat coats flour particles and gluten strands, creating a more tender crumb. Oil also helps retain moisture, preventing the bread from drying out quickly.
Salt serves multiple functions beyond simple seasoning. It strengthens gluten bonds, creating better structure. It controls yeast fermentation, preventing overly rapid rising that can create off flavors. Salt also enhances the natural wheat flavor of the bread. Using fine sea salt or table salt ensures even distribution throughout the dough.
Step by Step Preparation Method
Mixing and Initial Fermentation
Begin by combining warm water with yeast and sugar in a large mixing bowl. The sugar provides immediate food for the yeast, accelerating activation. Allow this mixture to stand for approximately five to ten minutes. During this time, the yeast should become foamy and aromatic, indicating active fermentation.
Once the yeast activates, add the olive oil and salt. Gradually incorporate flour, beginning with about two cups and adding more as needed. The exact amount of flour required varies based on humidity, flour type, and measuring methods. Aim for a soft, slightly sticky dough that pulls away from the bowl sides but remains tacky to touch.

Kneading and Gluten Development
Transfer the dough to a lightly floured work surface. Kneading develops the gluten network essential for proper texture and pocket formation. Press the dough away from you with the heel of your hand, fold it back over itself, give it a quarter turn, and repeat this motion.
Continue kneading for eight to ten minutes. The dough transforms gradually from rough and sticky to smooth and elastic. When properly kneaded, the dough should feel supple and spring back when poked. If you stretch a small piece, it should form a thin, translucent membrane without tearing immediately. This windowpane test confirms adequate gluten development.
Avoid adding excessive flour during kneading. Use only enough to prevent sticking. Too much flour creates tough, dry pita bread. If the dough seems very sticky, knead for a few more minutes before adding more flour. Often, continued kneading solves stickiness issues as gluten develops.
First Rise and Fermentation
Place the kneaded dough in a bowl lightly coated with oil. Turn the dough to coat all surfaces, preventing a dry skin from forming. Cover the bowl with a damp kitchen towel or plastic wrap.
Set the covered bowl in a warm, draft free location. Ideal rising temperatures range from 75 to 85 degrees Fahrenheit. Warmer temperatures speed rising, while cooler temperatures slow it. The dough should approximately double in size, typically requiring 60 to 90 minutes depending on room temperature.
To test if the dough has risen sufficiently, gently press two fingers about half an inch into the dough. If the indentation remains and fills in very slowly, the dough is ready. If it springs back quickly, allow more rising time.
Dividing and Shaping
Once the dough has doubled, press down firmly to deflate it, releasing accumulated gases. Transfer the dough to your work surface and divide it into six to eight equal portions. For uniform size, weigh the pieces using a kitchen scale. Each piece should weigh approximately 90 to 100 grams for standard sized pitas.
Shape each portion into a smooth ball by pulling the edges underneath and rolling between your palms. Arrange the balls on a floured surface, spacing them several inches apart. Cover with a damp towel and allow them to rest for 20 to 30 minutes. This resting period, called bench rest, allows the gluten to relax. Attempting to roll out the dough without this rest results in dough that constantly shrinks back.
Rolling Technique
Working with one dough ball at a time while keeping others covered, place it on a lightly floured surface. Using a rolling pin, roll from the center outward, rotating the dough frequently to maintain a circular shape. Apply even pressure to create consistent thickness throughout.
Aim for circles approximately six to seven inches in diameter and one quarter inch thick. Consistent thickness is crucial for even puffing. Thicker areas may not heat through completely, while thinner areas may burn before the pocket forms. If you notice the dough resisting and shrinking back, let it rest for a few more minutes before continuing.
Avoid creating a depression in the center of the rolled dough, as this can prevent proper puffing. The dough should be uniformly thick from edge to center. As you roll each pita, transfer it to parchment paper or a floured surface, keeping them covered until ready to bake.
Baking Methods and Techniques
Oven Baking for Maximum Puffing
Oven baking produces the most dramatic puffing and authentic texture. Preheat your oven to 475 degrees Fahrenheit, placing a baking stone, steel, or inverted baking sheet on the center rack. Allow at least 20 minutes for thorough preheating. The surface must be extremely hot to create the rapid steam expansion that forms the pocket.
If using parchment paper, slide the pita onto the paper and transfer both to the preheated surface. The parchment protects the pita from direct contact with the metal while still allowing heat transfer. Watch through the oven window as the pita bakes. Within 90 seconds to two minutes, you should see the dough begin bubbling and then dramatically puffing into a balloon.
Bake for two to three minutes total, just until the pita puffs and develops light golden spots. Overbaking dries out the bread and makes it stiff. The pita will deflate as it cools, leaving the characteristic pocket inside. Stack finished pitas under a kitchen towel, which traps steam and keeps them soft and pliable.

Stovetop Method
When you prefer not to heat the entire oven, stovetop cooking offers a practical alternative. Heat a heavy skillet, preferably cast iron, over medium high heat until very hot. A drop of water should sizzle and evaporate immediately on the surface.
Place a rolled pita directly in the dry skillet without any oil. Within 30 seconds, bubbles will begin forming on the surface. Flip the pita and cook the second side. The pita may puff on the stovetop, though typically less dramatically than in the oven. Cook for about one minute per side, watching for light brown spots.
Stovetop pitas tend to have a slightly different texture, more similar to flatbread, with a less pronounced pocket. They remain delicious and work perfectly for wraps and dipping, just with a somewhat denser structure.
Troubleshooting Common Issues
Pitas Not Puffing
Several factors prevent proper puffing. Insufficient oven temperature is the most common cause. If your oven runs cool or you did not preheat the baking surface long enough, the rapid steam expansion necessary for puffing cannot occur. Use an oven thermometer to verify actual temperature.
Uneven rolling creates thick spots that do not heat through quickly enough. Rolling too thin makes the dough fragile and unable to contain expanding steam. Aim for consistent one quarter inch thickness throughout each pita.
Overworked or underworked dough also affects puffing. Insufficient kneading means weak gluten structure that cannot contain steam. Excessive handling after rolling can deflate air pockets in the dough. Handle rolled pitas gently when transferring to the oven.
Dough Texture Problems
Sticky dough that adheres to your hands and work surface usually indicates insufficient flour or inadequate kneading time. Add flour conservatively, one tablespoon at a time, kneading thoroughly after each addition. Sometimes continued kneading solves stickiness as gluten develops.
Dry, cracking dough needs more water. Add it gradually, one tablespoon at a time, kneading thoroughly to incorporate. Dough should feel soft and supple, not dry or tough. Environmental factors like low humidity can cause dough to dry out, requiring hydration adjustments.
Dough that tears easily during rolling lacks sufficient gluten development. This indicates inadequate kneading time. If you notice tearing, gather the dough back together and knead for several more minutes before attempting to roll again.
Rising Issues
Dough that does not rise may have dead yeast. Always check yeast expiration dates and store yeast in the refrigerator or freezer for maximum freshness. The proofing step (foaming in warm water) confirms yeast viability before you invest time in mixing and kneading.
Room temperature significantly affects rising time. In cold kitchens, place the covered bowl in a turned off oven with the light on, creating a warm environment. In very warm conditions, dough may rise too quickly, creating a yeasty, alcohol-like flavor. Slower rising at cooler temperatures often produces better flavor.
Storage and Reheating Methods
Short Term Storage
Pita bread stays fresh at room temperature for two to three days when stored properly. Once completely cool, place pitas in an airtight plastic bag or container. Avoid refrigerating pita, as the cold environment accelerates staling through a process called retrogradation, where starch molecules recrystallize.
Keep stored pita away from direct sunlight and heat sources. A bread box or pantry shelf works well. If you notice the pita becoming slightly dry, a quick reheating restores softness.
Long Term Freezing
For extended storage, freezing preserves pita bread excellently for up to three months. Place a piece of parchment paper between each pita to prevent sticking. Store the stack in a freezer bag, pressing out excess air before sealing.
Frozen pita thaws quickly at room temperature in about 30 minutes. For faster results, wrap in a damp paper towel and microwave for 20 to 30 seconds. The moisture from the paper towel steams the pita, restoring its soft texture.
Reheating Techniques
The oven produces the best reheating results. Wrap pitas in aluminum foil and warm at 350 degrees Fahrenheit for five to seven minutes. The foil traps moisture, preventing drying while heating through.
For quick reheating, wrap a pita in a slightly damp paper towel and microwave for 10 to 15 seconds. The steam created by the damp towel softens the bread. Avoid overheating, which toughens the texture.
A hot skillet also works well for refreshing pita. Heat the pan over medium heat and warm each pita for about 15 seconds per side. This method crisps the exterior slightly while softening the interior.
Serving Suggestions and Uses
Traditional Applications
Pita bread’s pocket design makes it ideal for stuffing with various fillings. Classic preparations include falafel, grilled meats, fresh vegetables, and sauces. The pocket contains ingredients neatly, preventing the messy spills common with open faced sandwiches.
Tear pita into pieces for dipping in Tear pita into pieces for dipping in Mediterranean soups and healthy dips — perfect comfort meals for any season.
Creative Uses
Split pita horizontally through the pocket, creating two thin rounds. Top these with pizza sauce, cheese, and toppings, then broil for quick personal pizzas. The thin crust crisps beautifully and cooks in minutes.
Cut pita into triangles, brush with olive oil and seasonings, and bake until crispy for homemade pita chips. These work wonderfully with dips or as a crunchy salad topping.
Use pita as sandwich bread for any filling you would typically put in sliced bread. The pocket keeps ingredients contained better than traditional bread, making it especially good for lunch boxes.
Nutritional Considerations and Variations
Basic Nutritional Information
A standard white flour pita (approximately 60 grams) contains roughly 165 calories, 6 grams of protein, 33 grams of carbohydrates, and 1 gram of fat. It provides small amounts of iron, B vitamins, and selenium. The sodium content varies based on how much salt you use, typically around 300 milligrams per pita.
Whole Wheat Version
Substituting whole wheat flour for half or all of the white flour increases fiber content significantly, from about 1 gram to 4 grams per pita. Whole wheat also provides more minerals and B vitamins.
When using whole wheat flour, you may need slightly more water, as whole wheat absorbs more liquid. The texture becomes denser and the flavor more robust. Many people prefer a 50/50 blend of white and whole wheat flour, providing nutritional benefits while maintaining a lighter texture.
Herb and Spice Variations
Incorporating herbs and spices into the dough creates flavorful variations. Add two tablespoons of za’atar, dried oregano, or Italian herbs to the flour. Garlic powder, onion powder, or sesame seeds also work well.
For a slightly tangy flavor, substitute a portion of the water with plain yogurt. This also creates a softer, more tender texture.
The Science Behind Perfect Pita
Understanding Gluten Development
Gluten forms when two wheat proteins, glutenin and gliadin, combine with water and mechanical action (kneading). This creates an elastic network that traps gas bubbles and provides structure. Without adequate gluten development, pita dough cannot contain the steam necessary for pocket formation.
The kneading process aligns gluten strands and strengthens bonds between them. You can actually feel this happening as the dough transforms from rough and shaggy to smooth and elastic. This transformation is not just textural but structural at the molecular level.
Yeast Fermentation Process
Yeast is a living organism that feeds on sugars in the dough, producing carbon dioxide and alcohol as byproducts. The carbon dioxide gets trapped in the gluten network, causing the dough to rise. The alcohol mostly evaporates during baking, contributing to flavor development.
Temperature controls fermentation rate. Warmer temperatures accelerate yeast activity, while cooler temperatures slow it. This is why you can refrigerate dough for slow fermentation, developing more complex flavors over extended periods.
Heat Transfer and Steam Generation
When pita enters a very hot oven, heat rapidly conducts through the dough from the hot baking surface and radiates from oven walls. This heat converts moisture in the dough to steam almost instantly. Steam expands rapidly, exerting pressure that separates the top and bottom layers.
The gluten network must be strong enough to contain this pressure without tearing. If the seal around the edges holds while the center expands, the characteristic pocket forms. As the bread cools, the steam condenses, leaving the hollow interior we expect in pita.
Final Tips
Making pita bread at home connects you with an ancient baking tradition while providing control over ingredients and superior freshness. The process, while requiring attention to detail, becomes intuitive with practice.
Remember that not every pita will puff perfectly, even for experienced bakers. Those that remain flat still taste delicious and work perfectly well for wraps and dipping. View pita making as a practice you refine over time rather than a technique you must perfect immediately.
Start with the basic recipe and technique described here. As you gain confidence, experiment with different flours, add herbs and spices, or try different serving methods. The fundamental principles remain the same regardless of variations.
Most importantly, enjoy the process and the results. Fresh, warm pita bread straight from your oven represents one of cooking’s simple pleasures, requiring only basic ingredients and bringing satisfaction far exceeding the modest effort involved.
Sources:
We carefully draw from trusted, evidence-backed sources to ensure our content’s accuracy and reliability.
Homemade Pita Bread Recipe – The Mediterranean Dish
Provides a step-by-step guide to making soft, authentic pita bread, matching your recipe instructions.
Pita Bread Nutrition Facts – Verywell Fit
Supports your nutritional section with calorie, protein, carbohydrate, and fiber information.
Whole Wheat Pita Benefits – Wildgrain
Explains health benefits of whole wheat pita, including fiber and vitamins.
Science of Pita Bread Pocket – Happy Acres
Details gluten development and steam formation, supporting your “pocket formation” explanation.

Hello! I’m Sangay Choda, the creator of Mediterranean Diet Choice.
I’m not a doctor or licensed dietitian — I’m a health enthusiast who has spent years exploring the Mediterranean lifestyle and its proven benefits for long-term wellness, balance, and longevity.
My interest in this way of living began with a simple goal: to understand how everyday food choices can protect our hearts, improve energy, and support a happier life. Over time, I have researched and curated information from trusted medical and nutritional authorities, such as:
Harvard T.H. Chan School of Public Health
Mayo Clinic
World Health Organization (WHO)
National Institutes of Health (NIH) and more
I take complex, research-backed insights from these sources and transform them into easy-to-read, practical guides that anyone can apply — especially those looking to live healthier without restrictive diets or complicated plans.
While I do not offer medical advice, every article on this website is created with care, transparency, and a commitment to evidence-based information. My mission is to help readers make informed choices for a balanced, Mediterranean-inspired lifestyle.
Disclaimer: The content on this site is for informational and educational purposes only and should not be used as a substitute for professional medical advice. Always consult a qualified healthcare provider before making significant health or dietary changes. For more details, please visit our Disclaimer page.
For additional information about this website and its purpose, visit our About page. You can also review our Terms & Conditions to understand your rights and responsibilities when using this site.
Thank you for visiting Mediterranean Diet Choice.If you have questions, suggestions, or wish to collaborate, feel free to reach out at contact@mdietchoice.com or contact us.